Ingredients
- Chocolate
Instructions
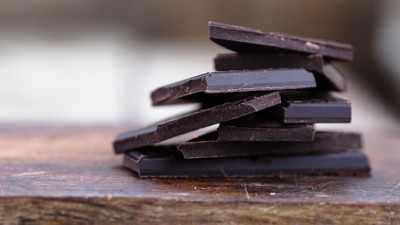
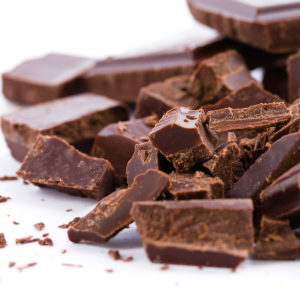
If you have a block of chocolate, break it up with a hammer
Melt the chocolate using the double boiler method or in a microwave
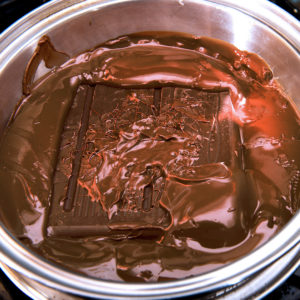
Melting Chocolate in a Double Boiler
Melt chocolate pieces, chips, or tablets using moderate heat in a heat-safe bowl positioned above a pot of boiling water. Stir occasionally. When you remove the liquid chocolate from the heat, take care to make sure that any moisture that has accumulated on the bottom of the pan is wiped away. If water seeps into your chocolate, it may become impossible to temper. Turn off heat when chocolate is completely liquid.
Melting Chocolate in a Microwave
Microwaving chocolate is actually my preferred method (at home) of melting chocolate. The key to success is heating in short intervals of time. I start with about 45 seconds. All microwaves are different so be conservative at first. A microwave produces an uneven distribution of heat. We can compensate for this drawback by stirring frequently. A general rule of thumb no matter which method you choose is that chocolate must be melted slowly and gently.
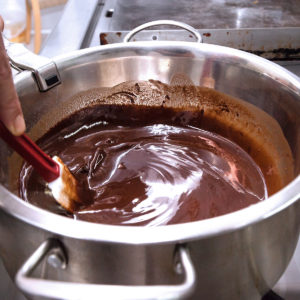
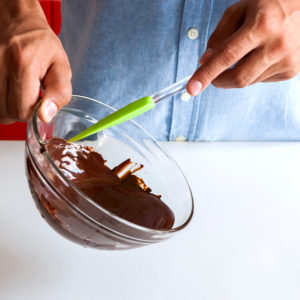
Begin by stirring the liquid chocolate, making sure that all of the lumps are out.
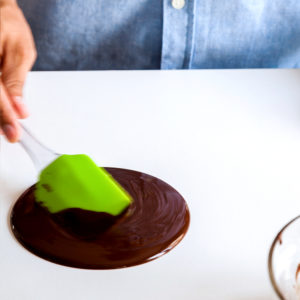
Pour the liquid chocolate onto the table.
Holding both spatulas, use your dominant hand to spread chocolate around your work surface.
Hold your other spatula in front, keeping it still.

Pick up a pile of chocolate using one spatula and scrape against your other spatula.
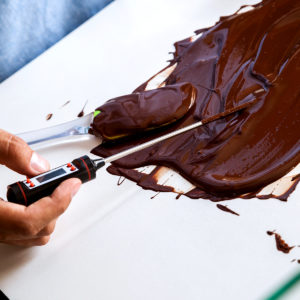
Continue to work the chocolate around your work surface until it is cool to the touch.
This process should take anywhere from 2 to 5 minutes depending on the temperature of the room. Once chocolate has become cool to the touch, scrape chocolate into a bowl in order to arrest the cooling process. Stir vigorously. You now have tempered chocolate that is ready to use for: dipping, molding and whatever else you can think of. At first, tempering chocolate will feel quite awkward. Practice tempering a few times before using to dip or coat.
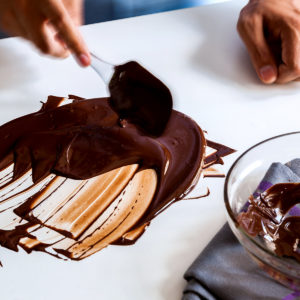
To get your chocolate back in the bowl, use a move similar to a shoveling type motion with a scraper.
Use one scraper by quickly sliding it under the puddle. Lift up the chocolate as though you are shoveling it. As you are doing this, hold your other scraper under the scraper you are using to shovel the chocolate. Scrape the chocolate off of your tools over the bowl. Once you have gotten the chocolate back into the bowl, stir it well.
Now that you have tempered chocolate try out any of our chocolate recipes below

Notes
When using a hammer to break chocolate, place a clean towel over the chocolate to keep the broken pieces in place.
If using the table method, test chocolate for temper by putting a dab on your wrist. If it feels cool, yet is still liquid, use the chocolate quickly.
If using the alternate method, test for temper by dipping something into the chocolate and allow it to cool in the refrigerator. The alternate method will give you more time before the chocolate sets up.
The first skill I learned as a 12-year-old candy maker was tempering chocolate, and the first product I ever made was chocolate-covered strawberries. As a rule, each Peterbrooke employee was trained on how to temper chocolate. Tempering chocolate is a great skill to learn. It is a fun activity to do with friends and family. It also unlocks so many doors. Simply by learning how to work with real chocolate, you can make an endless variety of dipped chocolates. The best part is that you can impress your friends with authentic chocolates.
Chocolate, in order to be considered authentic, must contain cocoa butter as its primary fat. Most “chocolates” produced by the home confectioners are not actually made with real chocolate. Usually they are created with what in the industry is known as a compound coating. These compounds are sometimes sold under the name “Candy Melts.” A compound coating leaves out the cocoa butter and replaces it with a more stable fat, usually palm kernel oil. Compound coatings can be melted and cooled to return to their original form whereas real chocolate cannot. People often use compound coating because it is inexpensive and easy to use and stable under a wide variety of temperatures and conditions. Chocolate, on the other hand, requires a little skill in producing and care in handling.
Another method often utilized by the home confectioner is to simply add another fat, wax or oil to real chocolate while it is in liquid form. These additives act to stabilize the chocolate, keeping it from losing its ”temper.” Unfortunately, doctored chocolate or fake chocolate do not taste like the real thing – one can easily tell the difference. No other fat releases the flavor of chocolate like cocoa butter.
Cocoa butter is a volatile fat. Unlike other hard fats, cocoa butter cannot be melted and cooled while returning to its original solid form. Returning cocoa butter to its original homogenous, solid state requires outside interference. It requires a process called tempering.
In candy school our teachers taught tempering as “time, temperature, and agitation.” As liquid chocolate cools, crystal patterns from in the cocoa butter. Most of the patterns that are formed at various temperatures are unstable. In other words, they will deteriorate quickly leaving a spotty, sticky or crumbly finish. Properly tempered chocolate, on the other hand, will have an even finish. It will not stick to the surfaces it touches and will have a clean break. These unstable crystal patterns are formed throughout most of the cooling process. Stable patterns are formed at a very specific temperature range; 81 to 84 degrees F. How can a candy maker prevent the formation of unstable patterns? Agitate, agitate, agitate! Mixing the liquid chocolate thoroughly and constantly as the chocolate is cooling will break up unstable patterns before they form. When the chocolate reaches the proper temperature range, stop agitating and use the chocolate to dip or mold. You can test the temperature simply by putting a dab on your wrist. If the chocolate feels cool to the touch, it is ready. If it is still warm, keep tempering.
The table method is a quick, nearly foolproof method of tempering chocolate. It yields a good temper because it leads a candy maker to overcompensate, going lower than required on temperature. Yet with this method, one must work fast, for the chocolate can set up rapidly. The good news is that we can melt and retemper chocolate an endless amount of times.
Be patient and do not be intimidated. The table method is effective. It is the same method of tempering that I have taught employees, franchisees and customers for years. Most of the time, I can have them tempering chocolate within 15 minutes.
Equipment
- Marble or stone top or any hard, smooth cleanable surface (not glass)
- 2 tempering spatulas
- A microwavable bowl or double boiler setup (heat-proof bowl and pot)
- Hammer (For large blocks of chocolate)
- Rubber spatula